Welcome! This guide walks you through the first steps so you're ready to take bookings today. Set aside about fifteen minutes.

What you'll need

  1. 1Your FloatOS account (you have one — you're logged in).
  2. 2Your business details: address, opening hours and VAT number.
  3. 3Your payment provider (Mollie) credentials to connect online payments.

Your dashboard at a glance

Your dashboard summarises your day. Along the top sit four key figures: (1) bookings today, (2) revenue today, (3) active members and (4) gift cards sold.
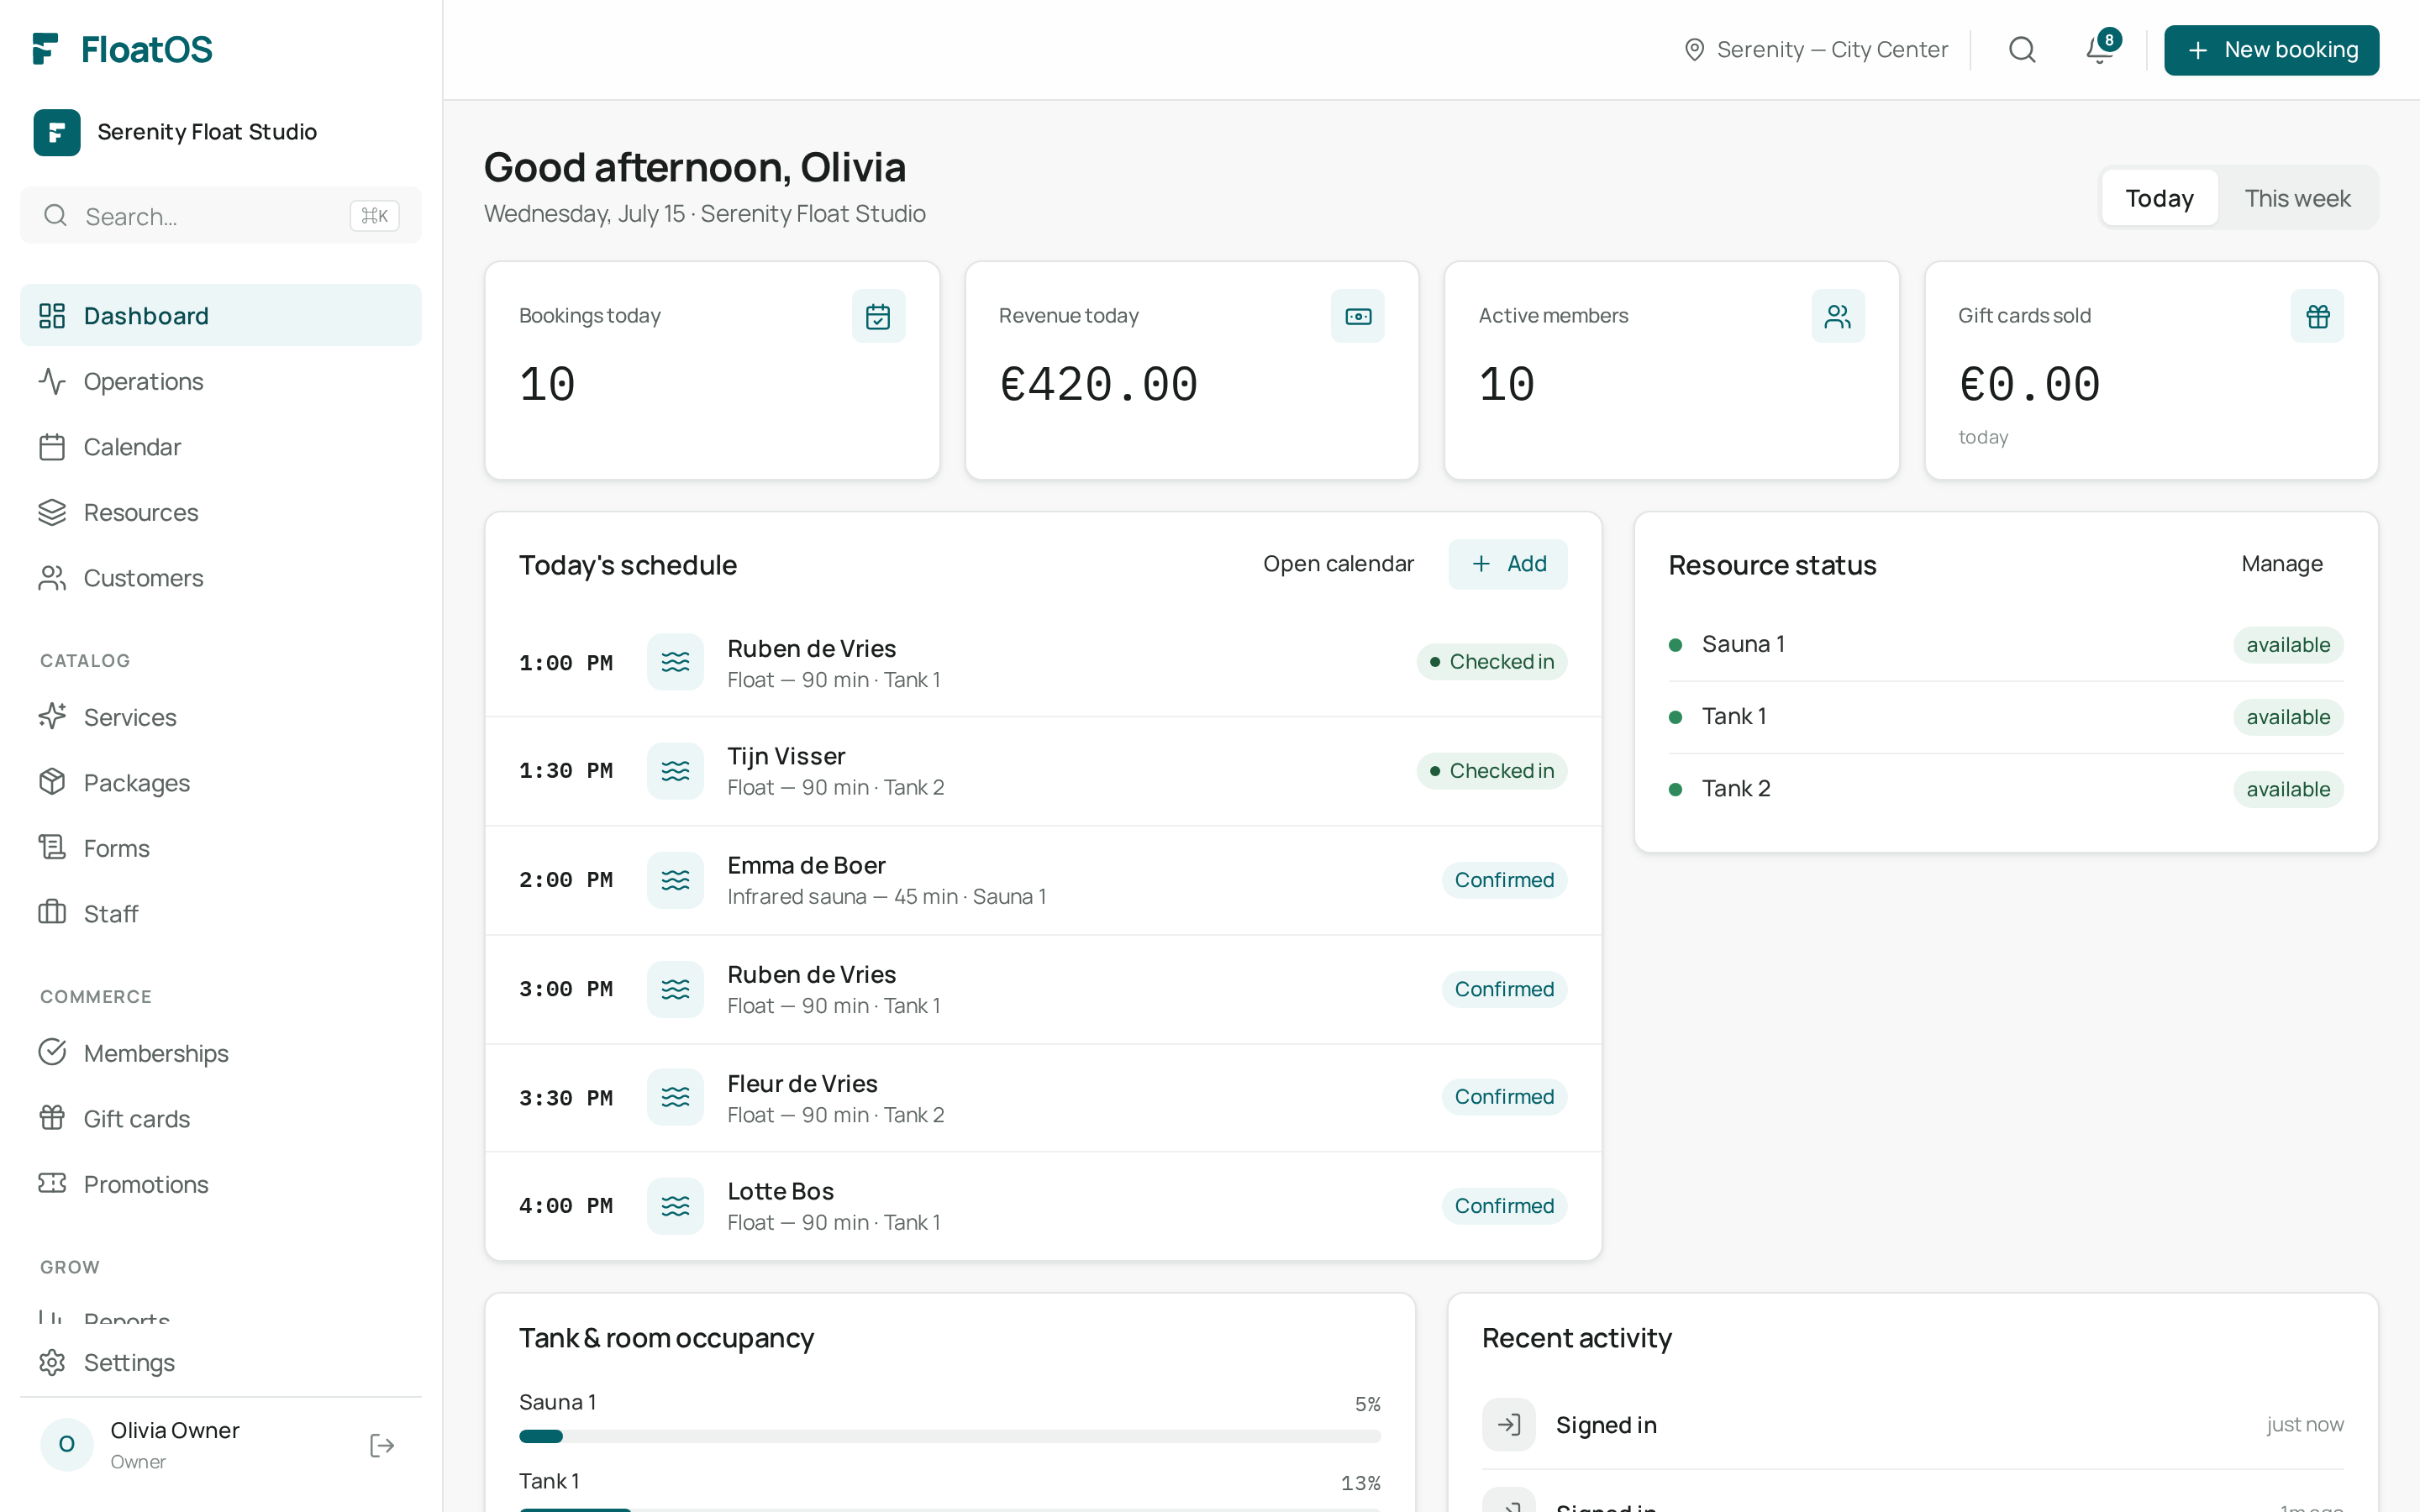
The FloatOS dashboard with numbered key figures1234
The four key figures at the top of your dashboard.

1. Fill in your center details

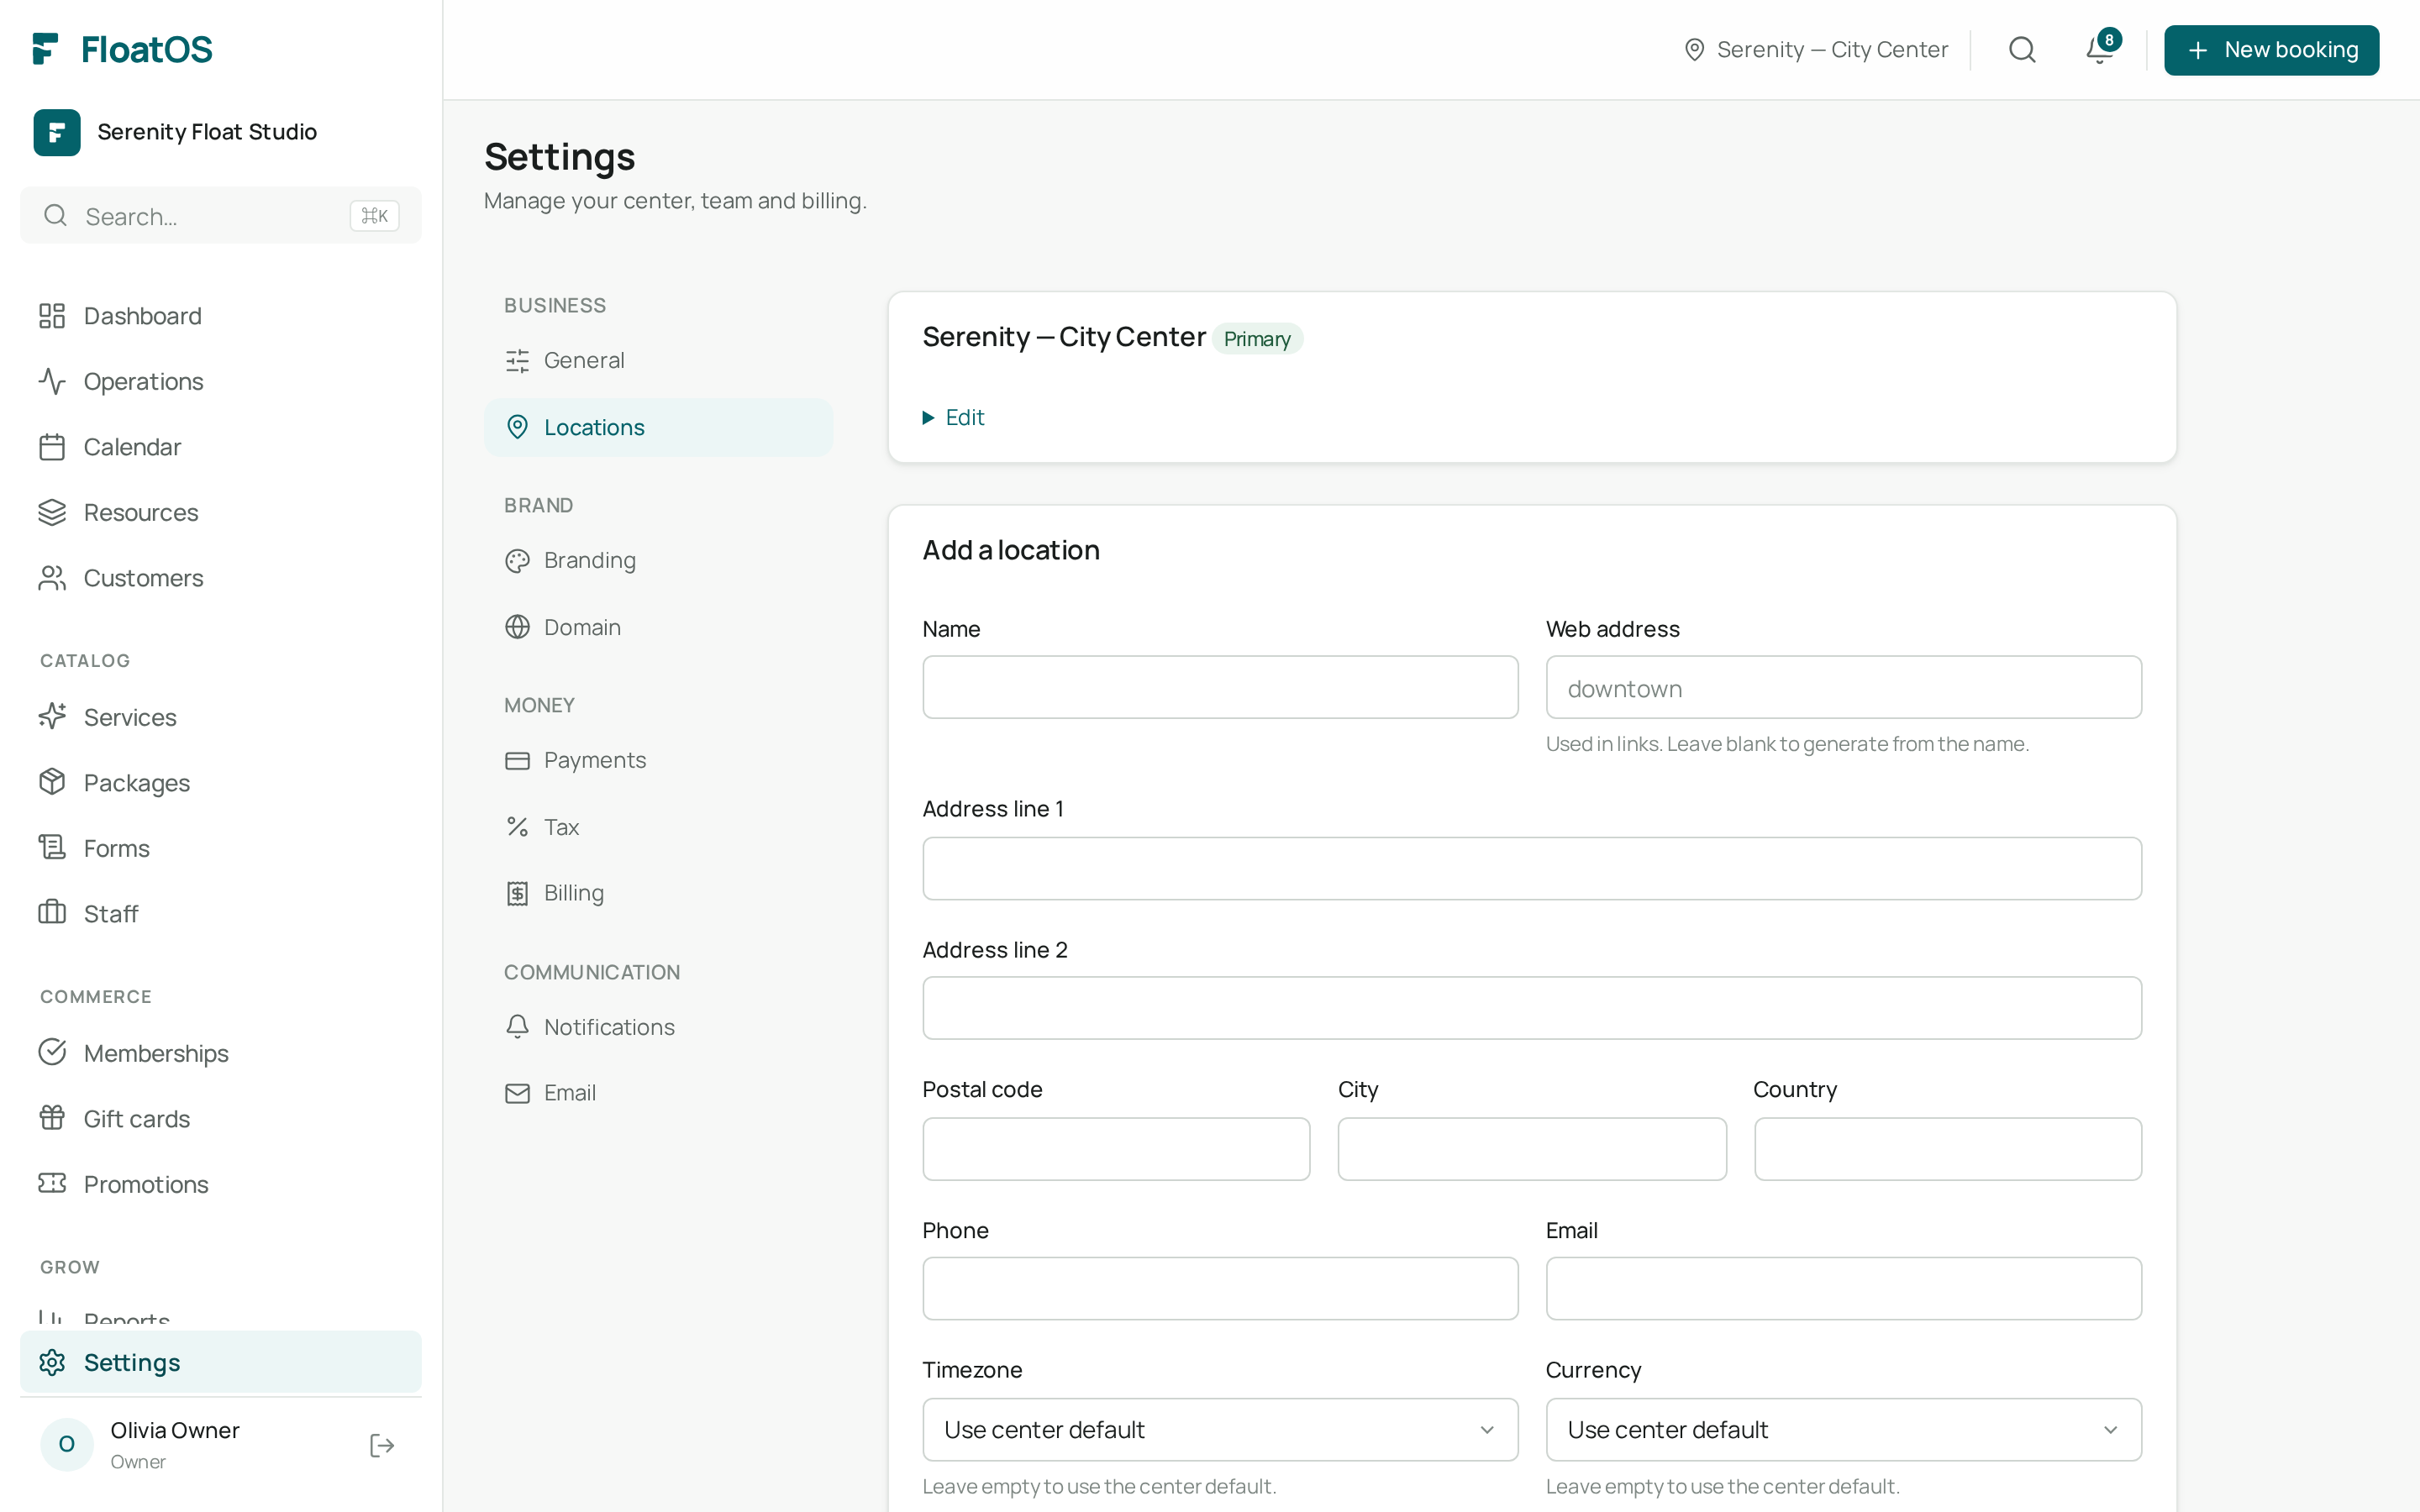
  1. 1Go to Settings → Locations and check your address and opening hours.
  2. 2Set your VAT rate under Settings → Tax.
  3. 3Connect your payment provider under Settings → Payments so customers can pay online.
Location settings
Settings → Locations: your address and opening hours.

2. Set your branding

Under Settings → Branding you decide how your center looks — that style is reused on your website, in emails and on your booking page.
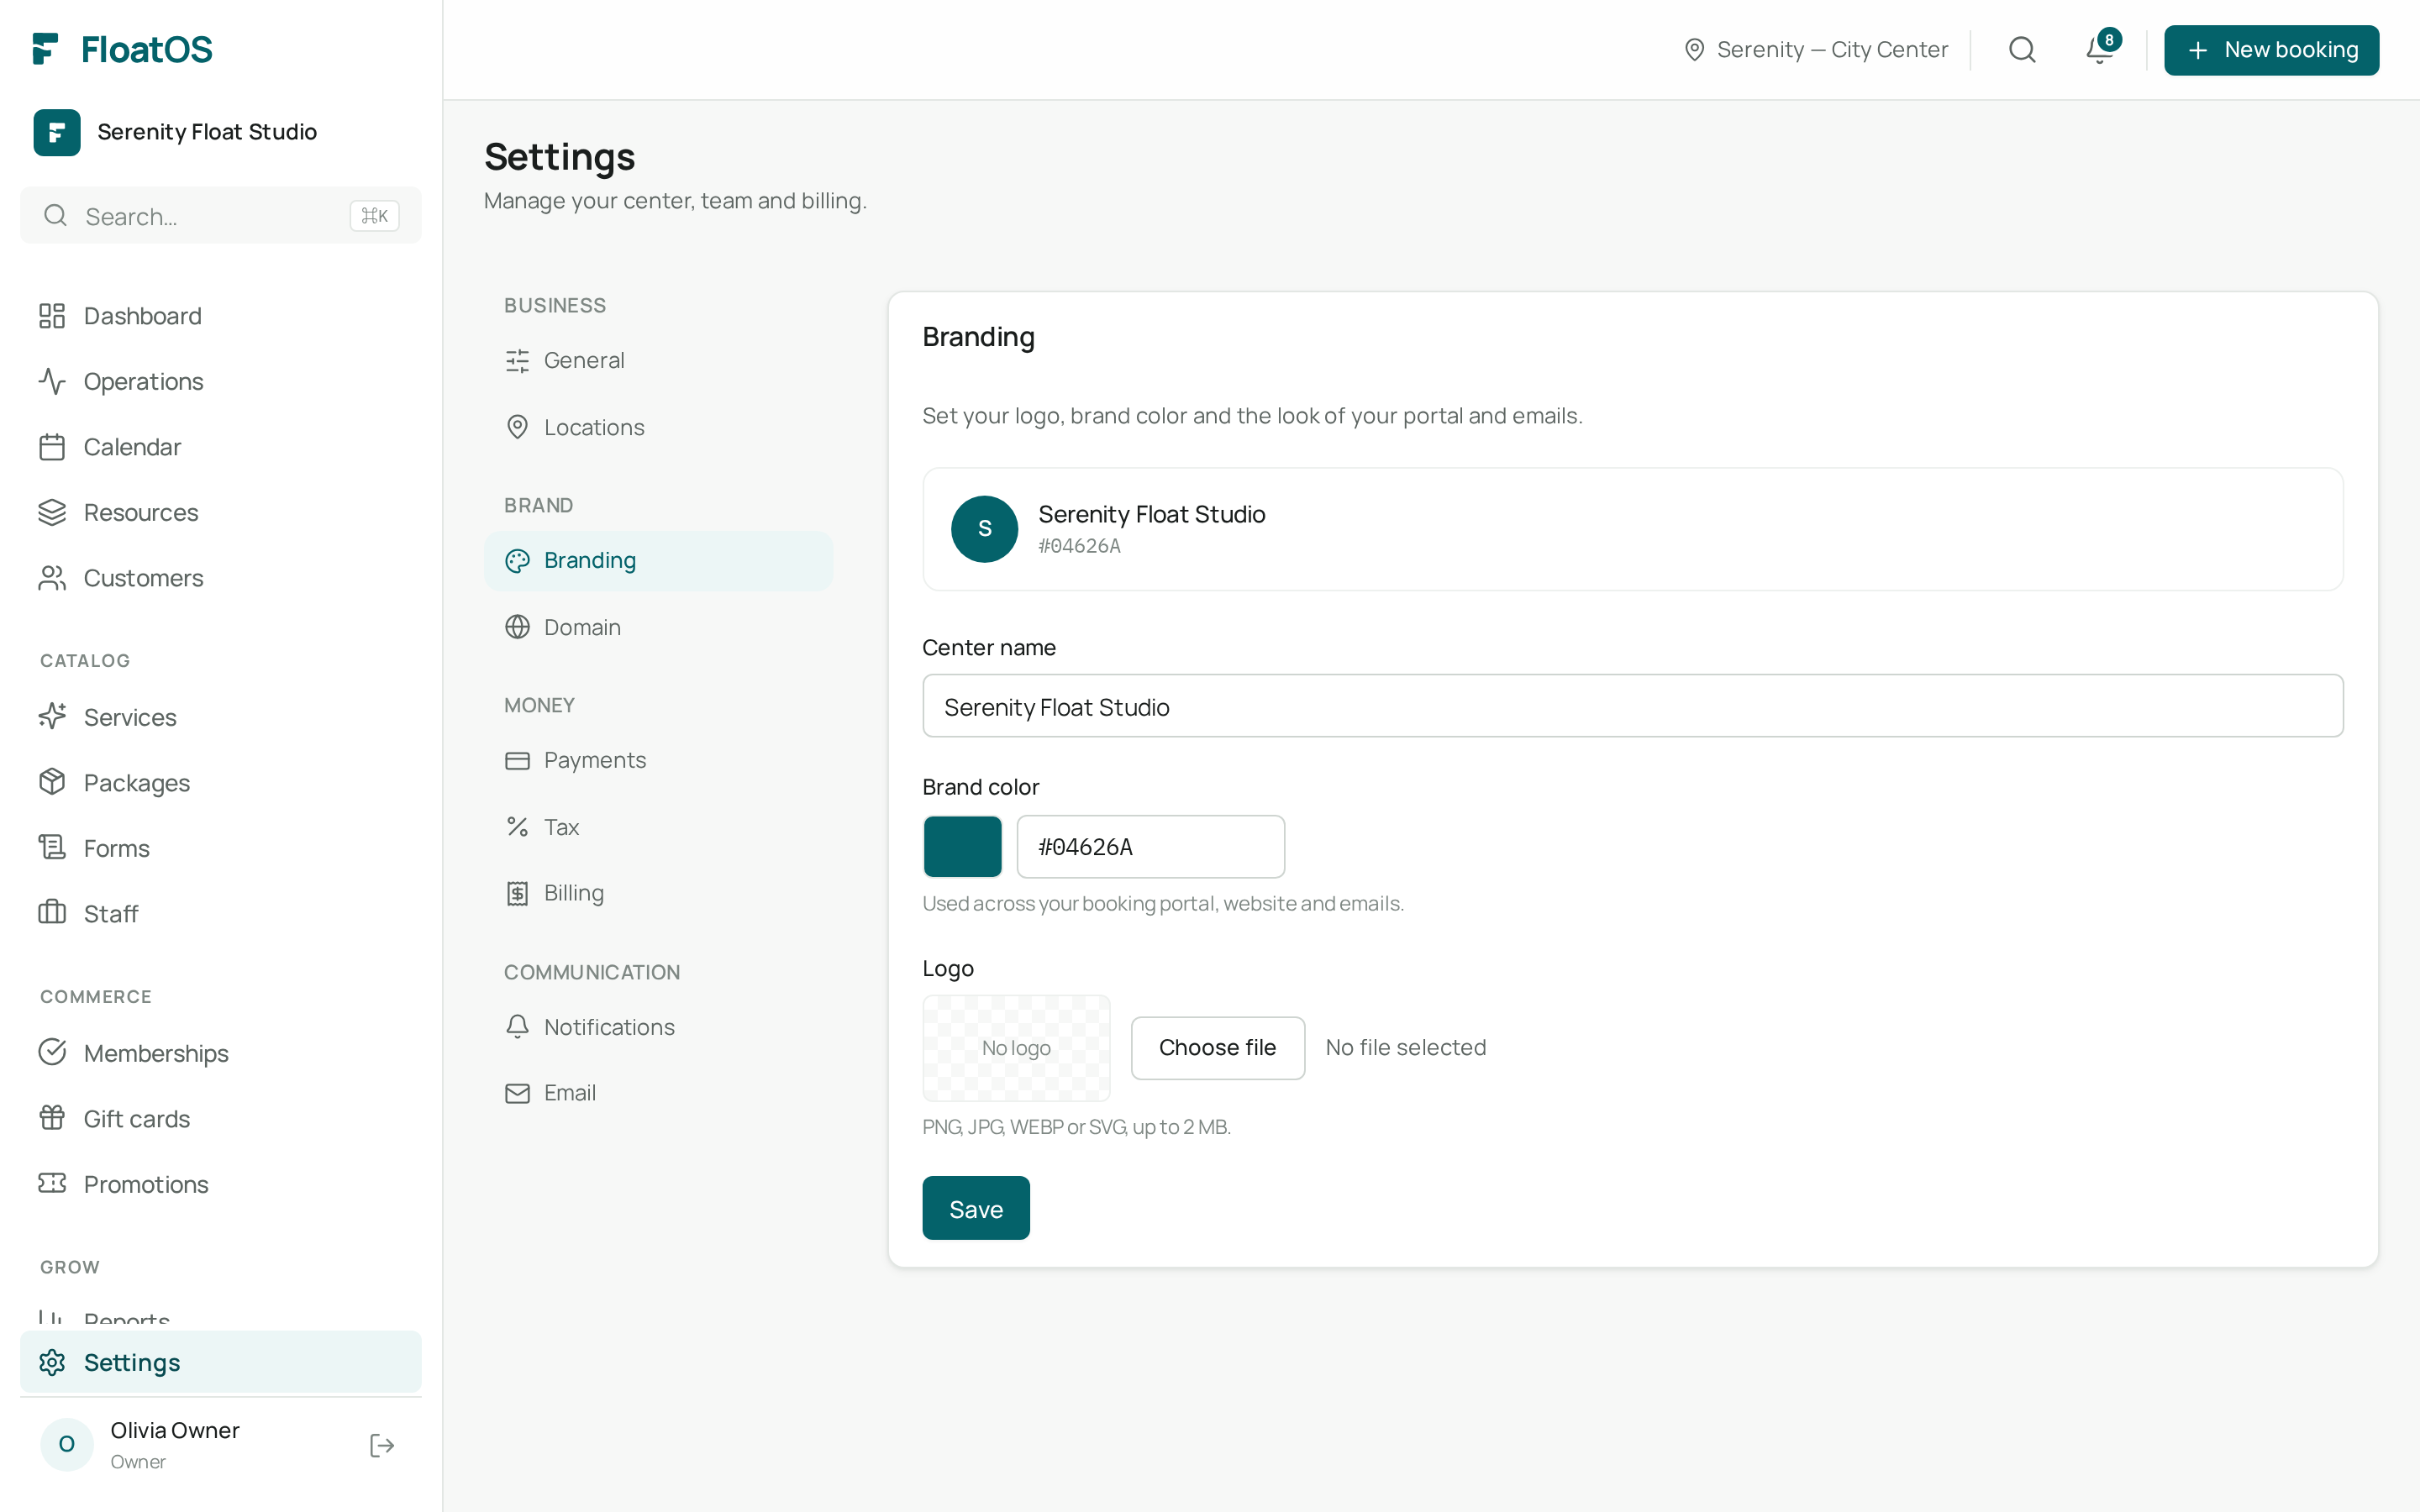
  1. 1Check your center's name.
  2. 2Choose your brand color (hex code).
  3. 3Upload your logo (PNG, JPG, WEBP or SVG, max 2 MB).
  4. 4Click Save.
Branding settings with numbered fields1234
The numbered fields match the steps above.

The result

Done! Your center now has details, a payment method and branding. You're ready to add services and take bookings.

Common mistakes

  1. 1Skipping your VAT rate — without it your prices and invoices won't add up.
  2. 2Forgetting to publish your website (see the next guide).
  3. 3Not connecting the payment provider, so customers can't pay online.

Veelgestelde vragen

Do I have to set everything up at once?

No. Start with your location, one service and a payment method. You can add the rest at any time.

#onboarding#setup
Was dit nuttig?
Vraag niet beantwoord?

Laat je vraag achter — ons team helpt je snel verder.